
When visiting Italy, one of the best ways to experience the country’s rich culture is by indulging in some delicious street food. The aromas of freshly baked bread, sizzling cheese, and savory meat fill the air, inviting you to indulge in some of the country’s tastiest treats.
There is nothing quite like the flavors and aromas of Italy, and certainly nothing like the taste of Italian street food with its fresh ingredients. However, it’s disappointing that I can’t enjoy these yummy treats daily right from my hometown in Michigan. There’s something quite special about Italian street foods. Perhaps it’s the simplicity of ingredients or the way street food is prepared that creates such complex flavors, or maybe it’s the experience of enjoying delicious food from street vendors while walking through the bustling streets of Italy. Whatever it is, Italian street food is delicious, and you shouldn’t need to take a trip to northern Italy or attend a street food festival to get it.
If you’re looking for a delicious and unique way to satisfy your cravings for Italian food without needing pricy nights out or local festivals, look no further! Italian street foods are a staple of the country’s culinary scene, with endless options for mouth-watering treats. However, if you’re yearning for a taste of Italy but can’t make the trip just yet, fret not; I’ve got you covered. I’m excited to share some amazing Italian street food recipes with you today; no fine dining necessary!
Focaccia bread
Focaccia is a flatbread commonly sold at Italian bakeries and street vendors. It’s flavored with olive oil, salt, and various herbs and can be enjoyed on its own or as a sandwich. First, you’ll mix flour, yeast, EVOO, and water to make a dough for your homemade focaccia. Then, add your choice of toppings, such as rosemary, olives, and cherry tomatoes, bake until golden brown, and eat til you’re full.
The best part about this delicious Italian street food is that you can add literally anything your heart desires to it, either during the baking process or as a topping afterward, and you’re sure to have a super tasty treat on your hands. Italian sausage and roasted red peppers with garlic dough? Yes, please! Whether you want your focaccia smothered in several different ingredients, or you prefer a simple version of life and choose to eat it with just butter, it can be eaten hot or served at room temperature, so it’s perfect for snacking on the go or a quick lunch or dinner starter!

Basic Focaccia Recipe
Ingredients:
- 4 c. All-purpose flour
- 2 c. warm filtered or tap water
- 2 1/4 tsp instant yeast
- 2 tsp kosher salt
- 4 tbsp EVOO (extra virgin olive oil)
- Softened butter (for greasing the pan)
- 1-2 tsp herbs (optional)
Instructions:
- Mix 4 cups of all-purpose white flour, 2 teaspoons of kosher salt, and 2 1/4 teaspoons of instant yeast (you know, that one packet you have lying around in your kitchen). Add 2 cups of warm tap water and give it a good stir. Be thorough so you don’t leave any bubbles of flour!
- Cover the bowl with plastic wrap and let it chill in the fridge for at least 8 hours (up to 24 hours). Yeah, I know it takes a while, but believe me, it’s worth it.
- Lightly coat two 9-inch cake pans with softened butter, then line them with parchment paper.
- Drizzle about a tablespoon of oil into the center of each pan and divide the dough into two halves. Place one-half of your creation in each pan and turn the dough to coat it with oil. Tuck the edges of the dough underneath to form a rough ball. It looks like you’re getting the hang of this already!
- Cover the pans with plastic wrap and let the dough rest for 2 hours (maybe a little longer, depending on how toasty you keep your kitchen). Trust me; your patience will be rewarded!
- When it’s time to get your bake on, preheat your oven to 450˚F. You’ll know you’re ready when the little dumplings you left cover most of the pan!
- Drizzle another tablespoon of oil over each dough round and use your oily fingers to press deep dimples all the way through the dough. I know it sounds violent, but we’re making focaccia bread here, not a delicate pastry! If needed, carefully stretch the dough as you dimple to get it to reach every corner of the pan.
- Sprinkle Italian seasoning (or chopped fresh herbs if you’re feeling fancy) and flaky sea salt on top of the dough. Mmm, can you smell it already?
- Now put those bread babies into the oven and immediately lower the temperature to 425˚F.
- Bake for 22 to 28 minutes, until the top is golden brown and the underside is crispy.
- Remove from the oven and place the bread on a cooling rack, using a metal spatula to ensure the bottom doesn’t stick.
- Let it cool for a few minutes, then serve warm with your favorite cheese or condiment on top! You can also allow it to cool completely and store it in an airtight container for up to three days or freeze it for a few months.
That’s it! Now you know how to make delicious Italian Focaccia bread right at home! You can also add some extra oil to the top of the focaccia right before baking for an extra oomph of deliciousness. Your family will love experimenting with herbs and toppings; the possibilities are endless! Enjoy!
Arancini
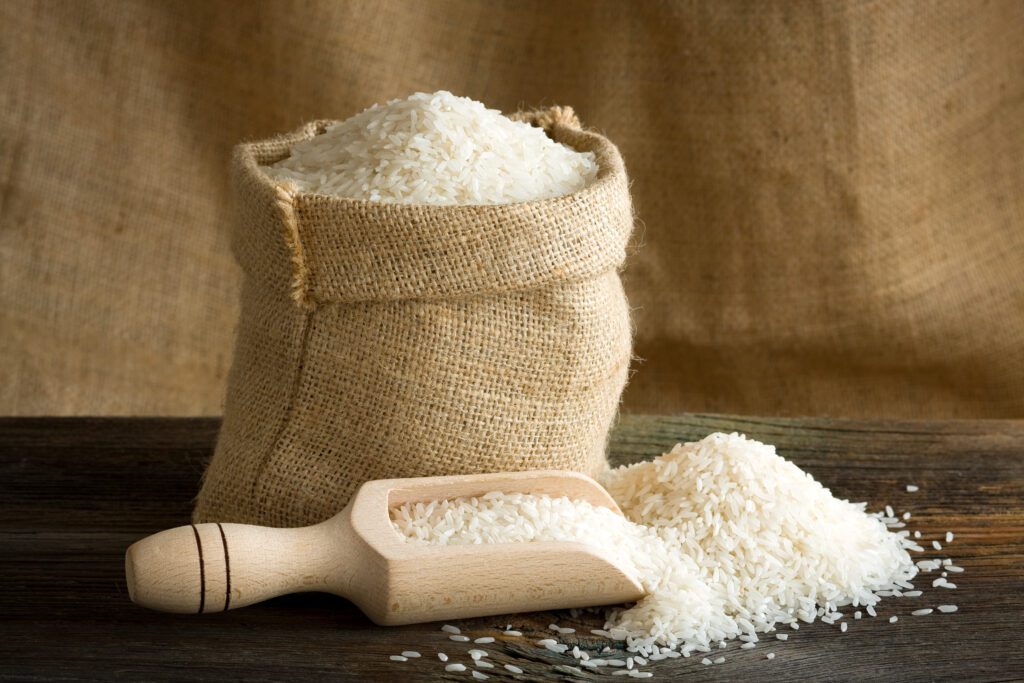
Arancini is a popular Italian street food delicacy that features crispy balls of rice filled with many variations of savory ingredients, breaded and fried in oil. It’s basically a ball of rice filled with minced meat (typically ground beef), veggies (peas, if we’re going traditional), and mozzarella cheese. The outer breading is crispy, while the center is soft and chewy. You can please any meat lover or vegetarian with some variation and experimentation with your stuffing options.
Traditionally made with risotto, a kind of creamy Italian rice covered in cheese sauce (think mac & cheese with rice instead of noodles!), you can make this Italian street food easily at home using up any leftover rice in the fridge to start this incredibly versatile dish that can be enjoyed as a snack or as a meal. These delicious fried rice balls with cheese filling are one of Sicily’s most popular Italian street foods, and with good reason!
Are you ready to take your rice game to the next level? Let’s mix things up with some tasty arancini! Don’t worry; it’s easier than it sounds. First, let’s start with the basic risotto recipe.
Basic Risotto Recipe
Ingredients:
- 32 oz chicken stock (unsalted) pre-warmed (If you prefer vegetable broth or stock, go for it!)
- 1 tbsp butter (unsalted)
- 1 c. Arborio rice
- 1 tbsp EVOO
- 1/4 tsp kosher salt
- 1/4 c. freshly grated cheese (I use Parmigiano-Reggiano or Pecorino-Romano)
1. First things first, we need to bring that chicken stock to a simmer (you can use veggie broth if that’s more your jam) and get that butter and oil melting in your skillet.
2. Now, here’s where the magic happens. Add the Arborio rice and watch it coat all the grains like a cozy little sweater.
3. Next up, add a ladle of broth (that’s 3/4 to 1 c., for those who measure things like normal people), and give it a good stir.
4. Don’t touch! Leave it alone for a few minutes until the broth absorbs into the rice. It’s like when you sip a perfect drink and hold it in your mouth for a moment, savoring all the flavors. When it’s ready (2-3 minutes), you should be able to run a spoon through it and draw a line without your channel filling with stock.
5. Now, we repeat the process. Add another ladle of broth, stir it up, and cook undisturbed until the rice absorbs it (2-3 minutes each time). Keep doing this until there’s only about one ladle of broth left, which should take around 16 to 18 minutes in total. You want the rice to be perfectly cooked, like a creamy soup with a little bite in the middle.
6. Once your risotto is on point, turn off the heat and add some salt, the remaining broth, and freshly grated cheese.
7. Give it a nice gentle stir for a couple of minutes, like you’re comforting a friend who just went through a breakup.
8. Serve it hot in some warmed bowls, with an extra sprinkle of cheese if you’re feeling cheesy (terrible pun intended).
Boom! You just made a delicious risotto in around 20 minutes! Now let’s turn our magical dish into something even more special!

Basic Arancini Recipe
Ingredients:
Vegetable oil (for frying)
2 large beaten eggs
2 c. of the risotto we just perfected
1 c. breadcrumbs, divided in half (you can use regular breadcrumbs, or even gluten-free or panko!)
1/2 tsp salt
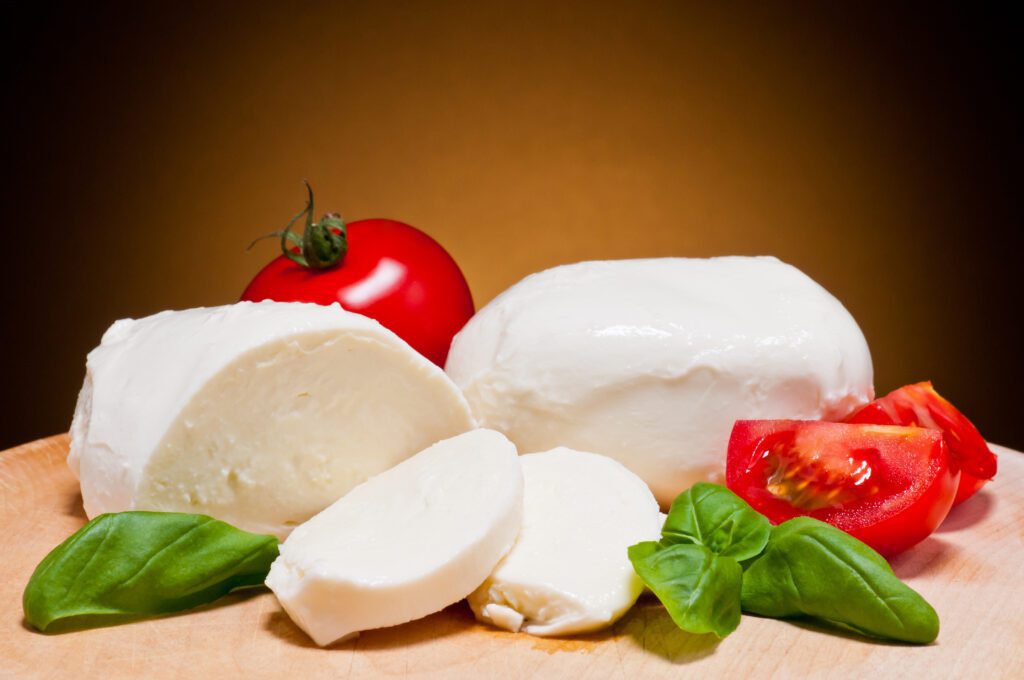
14 cubes of your favorite melting cheese (traditionally, mozzarella is the only way to go, but no one is judging you. It’s your kitchen!)
1. First, grab a bowl and toss in the leftover risotto from last night (or make some fresh if you’re feeling fancy). Throw a couple of eggs into the mix (beaten) and add in 1/2 cup of breadcrumbs. Mix it all up and let those flavors start to mingle.
2. Now, throw the rest of your breadcrumbs in a separate bowl with some salt. Give it a good mix and set it aside.
3. Time to get our hands a little dirty (my favorite part!) Grab a couple of tablespoons of the risotto mixture and form it into a ball in the palm of your hand. Then, make a little hole in the middle and stuff in a cheese square. Cover that baby entirely and roll your stuffed rice ball until it’s nice and round.
4. While stuffing varies, depending on taste, add peas to the center of your arancini if you’re trying to stay as close to an original recipe as possible. My family is unanimously against peas, so you’ll find me throwing mushrooms, red peppers, and even prosciutto into the mix. Sometimes we even make Philly cheesesteak, chili mac, or pepperoni and spinach balls! Use your imagination!
5. Grab your bowl of seasoned breadcrumbs and give each ball a good coating.
6. Now, onto the most satisfying part – frying! Heat vegetable oil in a pan and drop in those little balls of heaven once it’s 350°F/180°C. If you sprinkle the breadcrumbs into the oil and they crackle, then your oil is heated to perfection. Be careful not to overcrowd the pan; we don’t want any arancini casualties.
7. Fry for 3-5 minutes until they’re beautifully golden brown.
8. Use a slotted spoon to remove them from the oil and let those bad boys cool down a bit on a paper towel. And voila, your cheesy arancini dreams have come true! Serve them hot with your favorite marinara, and watch as everyone’s eyes light up with delight.
Suppli
These tempting rice balls are similar to arancini but with one key difference – they are traditionally filled with mozzarella and tomato sauce. Commonly found on the streets of Rome, suppli is a delicious and filling Italian street food that will satisfy any appetite. To make this fan favorite at home, you can follow the same recipe as our arancini and fill them with tomato sauce and mozzarella.
Cazzilli
Potato croquettes, or “Cazzilli,” are another deep-fried Italian street food favorite. These are balls of mashed potatoes and cheese coated with egg and breadcrumbs. Fry them in hot oil, and you’ll bite into a delicious blend of crispy coating and creamy potato. These crispy balls of mashed potatoes and cheese are the ultimate comfort food that’ll make your taste buds test the limits of pleasure.

Basic Cazzili Recipe
Ingredients:
- 2 lbs. potatoes
- 2 egg yolks
- Garlic cloves to your liking (I’ve said it before, and I’ll say it again, you could just feed my family the garlic, and we’d all rate it a 5-star meal; I use at least 3, sometimes more!)
- Parsley
- Grated parmesan cheese
- Salt and pepper (to taste)
- Flour or breadcrumbs (to taste)
- Peanut oil (for frying)
Instructions
1. Start by giving those spuds a good scrub to remove dirt.
2. Throw them in a pot, cover them with water, and bring them to a boil – simple, right? Try to use similar-sized potatoes so that they cook evenly! Boil for about 40 minutes. Use a pressure cooker if you want to cook them in half that time. Poke with a fork to check if the potatoes are cooked thoroughly.
3. Once the potatoes are good and boiled, run them through a potato masher.
4. Add garlic (the more, the merrier), parsley, and parmesan cheese. Mix until you have a thick paste that holds its shape.
5. Mold the potato mixture into small oblong croquette shapes, and pop them in the fridge to chill for about 2 hours (even better if they can hang out all night).
6. Once you’re ready to fry, proceed to bread the croquettes: beat the two eggs in a bowl with salt and pepper, and place the flour or breadcrumbs in another.
8. Dip your little croquettes in the egg mixture first, then move them over to the flour and breadcrumb bowl – make sure they’re fully coated to ensure maximum crispiness.
7. Heat peanut oil in a pan until it reaches a toasty 350°F (if you’re feeling fancy or not good at estimating when frying oil is ready, use a kitchen thermometer).
8. Drop in a few croquettes at a time to fry them up but don’t overcrowd the pan. Cook them with a skimmer, turning them over until they’re evenly golden on all sides.
9. Once you’re done frying, let those babies rest on a paper-lined plate to drain any excess oil.
10. And finally, the best part – devour those heavenly Cazzillis while they’re still hot and crispy. Trust me; they won’t be around for long!
Tip: If they hold together well during frying, you’ve nailed it. If not, add a little more flour, and you’ll be good to go.
These little pillows of joy will surely be a hit anywhere they’re served. Enjoy!
Pizza Bianca
I couldn’t very well give you a list of Italian street foods without bringing pizza to the table!
Pizza Bianca is a famous Italian street food originating in Rome and is essentially white pizza. It’s made using just a handful of simple ingredients, such as flour, water, salt, and oil.
To make a quick Pizza Bianca at home, grab your favorite premade crust, brush it with a mix of olive oil, garlic, and rosemary, and top it with some mozzarella cheese. Bake it in the oven for about 20 minutes, and you’ve got yourself a delicious Italian-style white pizza.

Folded Pizza
This half-moon-shaped pastry is another Italian street food that should be on your radar. And, if you’re local to Michigan, it more than likely already is! I know my family loves a traditional calzone, served hot and fresh from the oven. (with a side of ranch, please!)
A traditional calzone is stuffed with ricotta cheese, mozzarella, and pepperoni. However, you can load it with whatever your heart desires – porchetta (a famous pork roast stuffed with herbs and garlic), your favorite cold cuts, mushrooms, onions, peppers, even eggs – you name it, your perfect version of this oven baked favorite can be made! (I’m not here to judge. If you want to stuff a folded pizza with carbonara pasta for gooey, creamy goodness, you write your own story!)
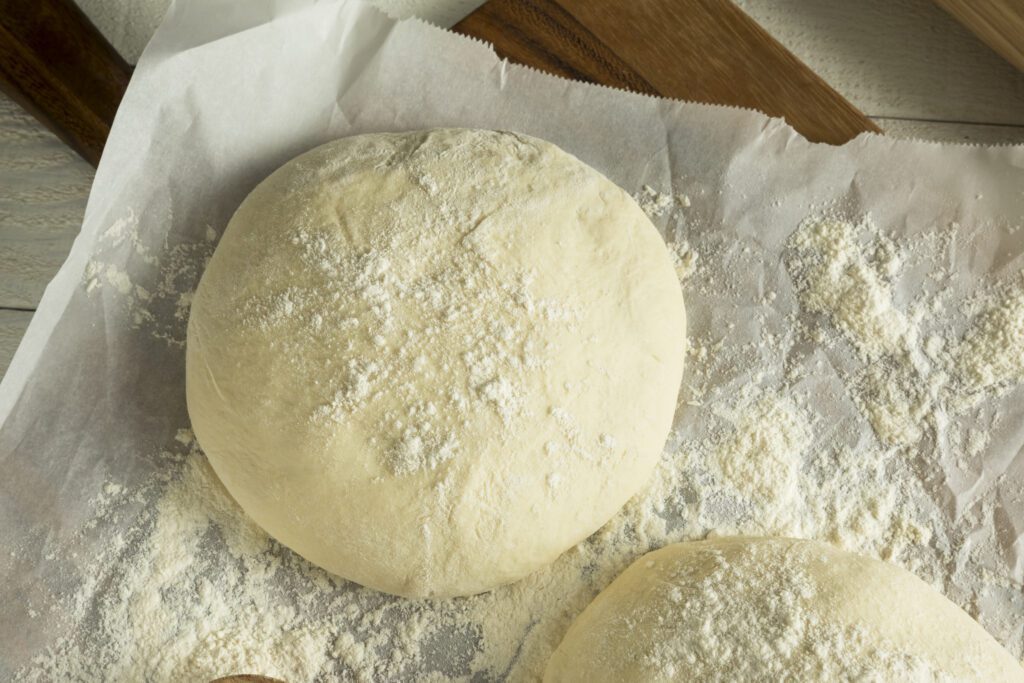
To make a calzone at home, grab your favorite pizza dough, roll it out into a thin circle, and fill it with all your different toppings. Fold the dough over, and press it together to seal the edges. Brush with a mix of oil and garlic, and bake in the oven for about 20 minutes. Cut into wedges (or halves) to serve, and enjoy!
Fritto Misto
The street-side vendors of Italy often sell freshly deep-fried seafood, known as Fritto Misto. You can make this dish at home by cutting a variety of seafood into bite-sized pieces and marinating them in olive oil, lemon juice, and a bit of salt pepper. Then, coat the pieces in flour or your favorite bread crumbs and fry them in hot oil till golden brown.
Do you know what’s better than regular old mayonnaise? GARLIC AIOLI! It’s the perfect way to add some extra pizzazz to your sandwiches or fries, and it’s easy to make! Serve the hot plate of seafood alongside this homemade aioli for dipping!
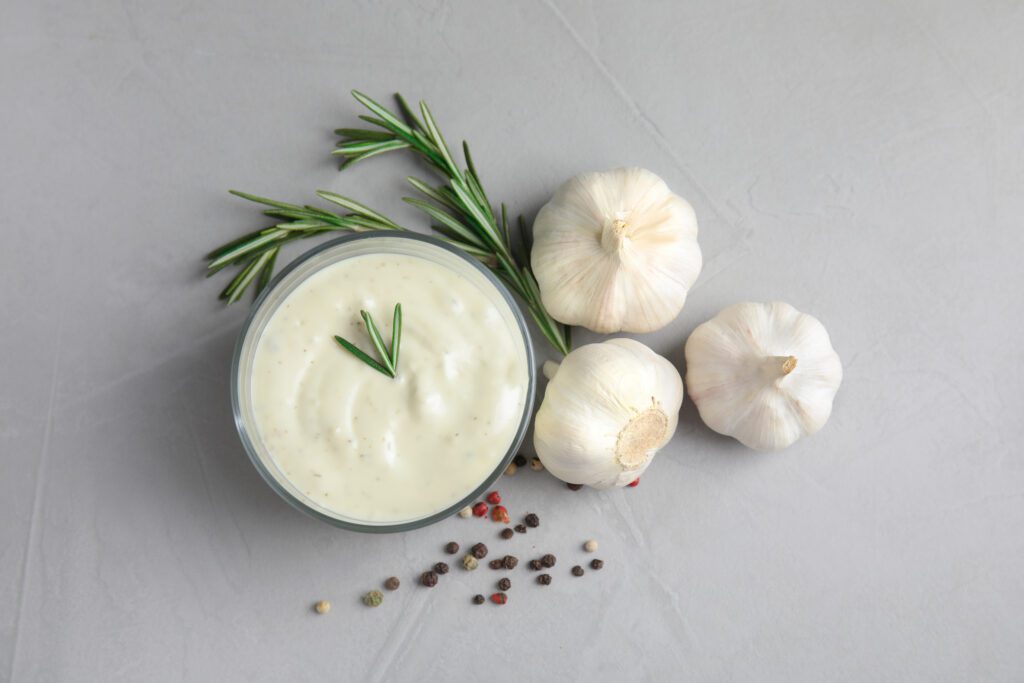
Basic Garlic Aioli
Ingredients:
- 4 large cloves of fresh garlic
- 1/2 tsp kosher salt or another favorite course-grain salt
- 1 tsp lemon juice (to taste)
- 1/2 c. EVOO
- 1 tsp water (as needed)
Instructions:
1. Peel and slice garlic.
2. Toss them in a mortar with kosher salt (or another coarse sea salt that tickles your fancy). Get those arms ready and mash away with the pestle until you’ve got a fine paste. Warning: Your kitchen is about to smell like garlic heaven.
3. Once you’ve got that paste, add some lemon juice and mix it all up.
4. Add a teaspoon of extra-virgin olive oil, stir, and mash that paste until the oil is perfectly incorporated.
5. Keep adding more oil (slowly, teaspoon by teaspoon) while stirring and mashing until your aioli is nice and thick.
6. If your aioli gets too thick, give it a little water to loosen up.
And there you have it – perfect garlic aioli that’ll knock your socks off. See, I told you it was easy and delicious! Spread anything leftover (yeah… right…) on a sandwich, dip some veggies, or smother it all over a juicy burger. The sky’s the limit, my friends—all thanks to the magical powers of garlic (and a bit of elbow grease).
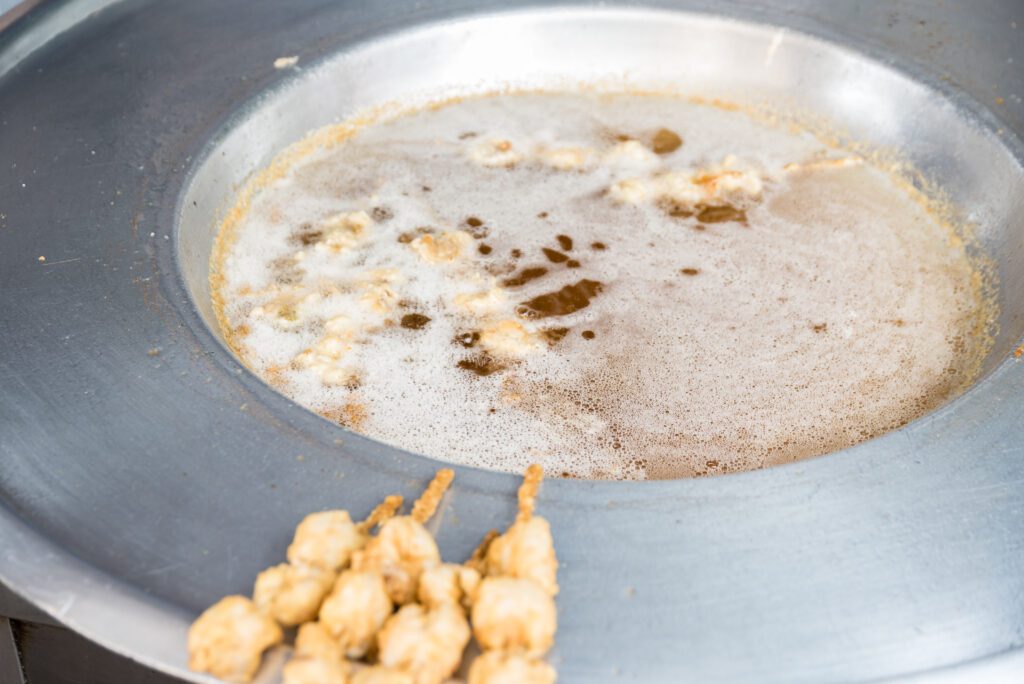
Panelle
These crispy chickpea fritters are a popular street food in Palermo, Sicily. Made with chickpea flour, parsley, and garlic, panelle are fried until golden and served in a sandwich or on their own. To make them at home, just mix the ingredients together, fry them up, and enjoy the crispy goodness.

Easy Panelle
Ingredients:
- 1 1/2 c. chickpea flour
- 3 c. water
- 1 tsp coarse sea salt or kosher salt
- 2 tbsp fresh parsley (chopped)
- Vegetable or canola oil for frying
Instructions:
1. Whisk the chickpea flour, salt, and water in a saucepan until the mixture is as smooth as a pancake batter.
2. Heat that baby to medium while stirring and scraping frequently. We want this mixture to be thick, creamy, and smooth. When it’s ready, it should start pulling away from the pan. (about 5 minutes.)
3. Next, we’ll pull the pan off the heat and add some parsley like the fancy folks we are.
4. Pour that heavenly mixture onto a 12″ x 15″ baking sheet lined with parchment and let it cool in the fridge for an hour. Be patient, friend – good things come to those who wait.
5. Once cooled and firm, cut that sucker into squares and fry ’em up in some oil until they’re golden brown and crispy. Mmm, can you smell that deliciousness?
6. Drain those panelle nuggets on paper towels, sprinkle on some salt, and serve ’em hot!
Yum, yum, yum – this is one recipe you won’t want to miss!
Bomboloni
Finally! A sweet treat!
Bomboloni is a must-have street food. It’s a type of Italian doughnut that is fluffy, crispy from the outside, and stuffed with various fillings. You can easily make Bomboloni at home by preparing flour, egg, milk, salt, yeast, and sugar into a dough. Then, fill them with a traditional favorite, or get creative and make your own unique custard fillings.
Do you want to feel like a master baker without actually having to spend hours perfecting your craft? Then, let me introduce you to my basic bomboloni recipe. It’s easy-peasy, lemon-squeezy (minus the lemon), and oh-so-delicious; you’re gonna wanna make these all the time!
You’ll need some simple ingredients to make these little balls of yum. But don’t worry; you don’t need to be a chemist to make this – just follow my lead!

Basic Bomboloni
Ingredients:
- 1/2 cup lukewarm milk
- 1 1/4 tsp active dry yeast
- 2 1/2 tbsp sugar
- 3 tbsp vegetable oil
- 1 large egg (room temperature)
- Zest from half an orange
- 1/2 tsp natural vanilla extract
- 2 1/8 c. all-purpose flour
- 1 pinch salt
- Filling of choice
Instructions:
1. First, grab your stand-up mixer bowl, add the milk, and sprinkle the yeast on top. Let that sit for five minutes to get acquainted.
2. Whisk the sugar, vegetable oil, egg, orange zest, and vanilla together and throw them into the yeast and milk. It’s like a party in the bowl, and everyone’s invited!
3. Now, slowly add the flour and a pinch of salt, and let your dough hook attachment knead that dough until it’s smooth and elastic. Don’t go higher than speed two, though; we don’t want to wake up the neighbors! Continue to knead the dough for about seven minutes.
4. Once the dough is ready, give it some TLC by forming it into a ball and giving it a spa treatment in a lightly oiled bowl.
5. Cover and let it rest and rise for a few hours in a nice, warm, cozy, draftless spot to hang out for a while (just like me on the couch binge-watching crime documentaries!)
6. Time to roll out the red carpet! Flatten it to about 1/4 -1/3 inch thick and cut it into six rounds – it’s like playing with playdough, except it’s tastier. A 2.5″ round cookie cutter should do the trick.
7. Place them on a cookie sheet lined with parchment paper and back off to let them rise again for another hour (I get it, naps are important to me, too!), and then we get to the fun part – frying!
8. Heat some vegetable oil (about 2 inches in a medium-sized pot) to about 340-350F, and fry the bombolonis for a few minutes on each side until they’re golden and crispy. (2-3 minutes per side should do the trick)
9. Once cooked, let them rest on a towel-lined plate for a hot minute (literally), then roll them in some granulated sugar. It’s like when you were a kid on the lake making sand angels, but tastier (without the weird grit in your mouth for days).
10. Remove the fried Bomboloni with a slotted spoon to a paper towel-lined plate. Leave them to cool briefly, immediately roll them in granulated sugar, and cover them well.
11. Finally, add your favorite filling – creamy pastry, chantilly, or hazelnut cream. Use the end of a wooden spoon to make a hole, add the filling, and serve ’em up with a steaming cup of Italian hot chocolate!
Share these tasty bomboloni with your loved ones, or eat them all yourself; I won’t judge. Because if I’ve learned anything in the past few years, it’s that self-love is essential. And nothing says “I love you” like fresh donuts!
Cannoli
Cannolis are a delightful and sweet Sicilian snack. It is a crispy shell filled with ricotta, chocolate, or other sweet fillings.
Who doesn’t love a good cannoli? It’s like a hug in a crispy shell filled with creamy goodness. And the best part? You don’t even have to be a pastry chef to make them! Try this traditional Italian dessert if you want the perfect snack to enjoy with friends. Let me walk you through the steps and make you feel like the baking queen (or king) that you are.

Easy Cannolis
Ingredients:
- 16 ounces of whole-milk ricotta cheese
- 2/3 c sugar
- 1 tbsp orange zest (about half an orange)
- 1/2 tsp pure vanilla extract
- 1 1/2 tbsp finely chopped candied ginger
- 1/4 c. semisweet miniature chocolate chips
- 8 5-inch premade cannoli shells (or mini cannoli shells)
Extra topping options may include:
- Pistachios
- Mixed nuts
- Candied ginger
- Powdered sugar
Instructions:
1. First, let’s talk about the star of the show – the ricotta. If you’re using a drier ricotta, there is no need to strain it. But if you’re working with a fresh and juicy one, you’ll want to strain it so it’s not too wet for the filling. I recommend using some cheesecloth, a fine mesh strainer, or even a good-quality paper towel to do the job.
2. Once your ricotta is strained, it’s time to mix it up with some sugar, orange zest, and vanilla. Grab your trusty hand mixer and mix it on medium-high speed for two minutes. The mixture should be lightly aerated to achieve optimal fluffiness.
3. Add some finely chopped candied ginger and semisweet miniature chocolate chips to take that filling to the next level. Mix it all together.
4. Let your mixture chill in an airtight container in the fridge for at least two hours. We want those flavors to get cozy and settled in that ricotta goodness.
5. Now, the fun part – filling up those premade cannoli shells! Grab a piping bag fitted with a piping tip slightly smaller than the opening of your shells. If you don’t have a piping bag or tips, don’t worry! Instead, use a freezer bag with the corner snipped off and fill it with your ricotta mixture.
6. Stick that tip into one end of the shell and squeeze until it’s about three-quarters full. Then, turn that shell around and fill up the other end.
Pro tip: if you’re feeling extra fancy, you can dip the ends into some chopped pistachios, mixed nuts, or mini chocolate chips for some extra pizzazz
7. Finally, for the finishing touch, give those cannolis a good dusting of powdered sugar before serving. It’s like a little snowy mountain waiting for you to munch on!
So there you have it – some easy cannolis that will impress your friends (or just yourself, let’s be honest). Now sit back, relax, and enjoy that sweet Sicilian treat. You deserve it.

Enjoy Italy in Your Own Kitchen!
Italian street food is an experience for the senses – from the smells of warm bread to the taste of savory treats. However, you don’t have to travel all the way to Italy to enjoy these treats; with these easy-to-follow recipes, you can make them at home.
Italian street food is a delicious way to experience the country’s vibrant culture and cuisine. With these recipes, you can recreate some of the tastiest and most popular street foods right from your kitchen.
These street foods are perfect for a snack, a party, or a fun family dinner. The beauty of these Italian street foods is that they can be tweaked to your personal tastes, and you can experiment with your toppings and fillings. So whether you’re making pizza as a family, snacking on arancini, or indulging in a cannoli, these dishes will surely please everyone.
So, gather your ingredients, add some Italian music, and start cooking your favorite popular street food!
Bio:
Sophia Doris lives in the Detroit Metro area and loves cooking and eating clean whenever possible. She has strong family values and hopes to publish a children’s book to inspire children to try new things (even when they are scary). Sophia enjoys checking out new restaurants and trying craft cocktails when she isn’t spending time with her family.